Want to root Nexus 5X? You have come to the right place. In this guide, I will show you how to easily and quickly root Google Nexus 5X using Chainfire’s rooting package for Nexus 5X aka Bullhead. Android community was fast at coming up with a root method for Google Nexus 5X. Thanks to the legendary Android root developer Chainfire, who has come up with an entirely new “systemless” rooting method that, along with other good stuff, makes the updating a bit convenient.
Rooting Nexus 5X will give you more control over deeper software level customizations which are not limited to the looks of the operating system, but also allows you to boost the speed and battery life of your device with a bit of tuning. The scope is boundless. The process to root Nexus 5X is relatively a simple process, but I will take you through a step-by-step process to achieve the root access on your device.
Apart from the root package for the Nexus 5X, you also need TWRP recovery for Nexus 5X, along with a modified boot image file. We’ve covered each and every aspect of the Nexus 5X root process is a step-by-step guide below. Before continuing with the rooting process, just make sure that you fulfill the prerequisites mentioned below.
Prerequisites

Install Nexus 5X Drivers:
To root your Nexus 5X, it is necessary to have proper Android drivers installed for it. If you do not already have the drivers for your Nexus 5X, simply follow the link floating towards the right to download drivers for your device.
Backup your Important stuff:
It is always a good idea to have a backup of your important stuff that your have on your device before tinkering with it. If you’ve not already, take a backup of your personal stuff that you have on your Google Nexus 5X.
Setup ADB & Fastboot:
After having properly installed Android drivers, it is also necessary to setup ADB & Fastboot on your computer. There are a few ways to achieve that, but ADB Installer provides the easiest solution to install ADB & Fastboot along with the USB drivers. The official way to install and setup ADB & Fastboot on your computer is by installing Android SDK, which is a lengthy and time-consuming process. Simply follow the link floating to the right in order to get detailed instructions on ADB & Fastboot installation on Windows, Mac OS X, or Linux.

Unlock Bootloader:
You cannot tinker with your Nexus device if its bootloader is locked. It is very easy to unlock bootloader of your Nexus 5X, simply put your device in Fastboot mode, connect it to your computer, open Command prompt, and execute the following command:
fastboot flashing unlock
Follow the on-screen instructions to complete the process. If you’re having trouble in unlocking bootloader, simply follow the related article link floating towards the right.
After you fulfill the above-mentioned prerequisites, you can now proceed with the step-by-step guide to root Nexus 5X.
How to root Nexus 5X on Android Marshmallow
Here’s is how to root Nexus 5X running Android Marshmallow with Chainfire’s SuperSU root package:
- First of all, you need to install a custom recovery on your Nexus 5X. Simply follow our detailed guide on how to install TWRP recovery on Nexus 5X and also make sure to flash the modified boot image mentioned in that guide. After installing TWRP recovery and modified boot image, come back here and continue.
- Download BETA-SuperSU-v2.52.zip, connect your Nexus 5X to your computer and copy the downloaded file to your phone’s storage.
- Disconnect your phone from computer and put it in Fastboot mode:
- Press and hold both the “Power” + “Volume Down” + “Volume Up” buttons until you see an Android Robot with big Start label at the top. That’s Fastboot mode.
- Now use volume keys to navigate to Recovery Mode option and press power key to confirm the selection. This should put your Nexus 5X in TWRP recovery mode.

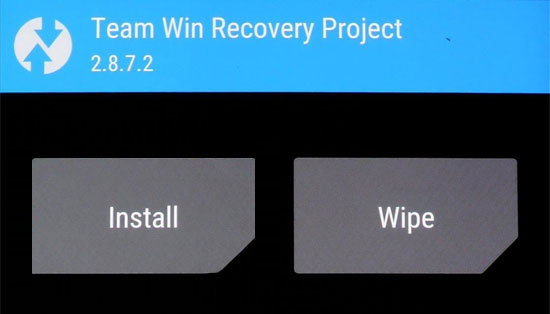
- Go to Install menu, navigate to the directory where you have SuperSU stored on your phone storage, and select it.

- Swipe to Install the SuperSU root package on your Nexus 5X.
- Once the root package has been installed on your Nexus 5X, you’ll see an option to wipe cache/dalvik and an option to reboot system. First, Wipe the cache/dalvik, tap the back button, and then tap the reboot system button.
How to Verify Nexus 5X Root
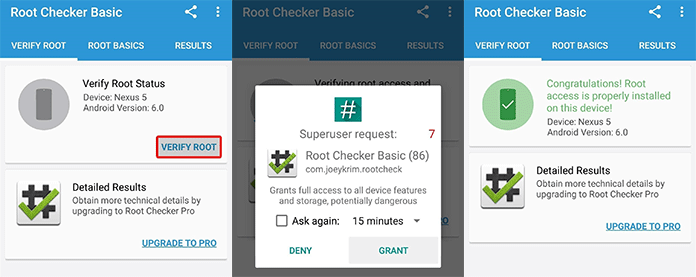
- To verify that your Nexus 5X has indeed been rooted, install an app called, “Root Checker” from the Play Store.

- Once installed, open the app and tap on “Verify Root.”
- Tap “Grant” when the app asked for Superuser access.
- If the device is rooted successfully, you will see a message saying “Congratulations! Root access is properly installed on this device!”

That’s it! you have successfully achieved Google Nexus 5X root access.
Chainfire’s root has been given the name “systemless” because it doesn’t modify Android’s system partition and achieves the root. This new rooting method bypasses only a few Android’s built-in security measure to gain the root access. This is why the early reports indicated that the Android Pay does work with this rooting method.