If you have ever tinkered with an Android device, you’d have probably heard of the term “USB Debugging”. Enabling USB debugging is the elementary step of installing a custom ROM, rooting, or doing any kind of hackery to your android phone or tablet. You can easily Enable USB debugging mode on Android and it can be accomplished in few quick steps.
What is USB debugging?
Android applications are not developed directly on an Android device, rather an Android SDK is used to code the apps and those apps are then transferred to an Android device for testing using USB Debugging mode. In other words, USB debugging mode acts like a bridge that creates a connection between an Android device and a computer though a USB cable for deeper-level actions.
In latest Android versions, Google has put the USB Debugging feature under Developer options menu and because of this, one may think that this feature is related to developers only. But that’s not entirely true. Whenever you want to root your device, install a custom ROM of flash a custom recovery, you’ll be asked to enable USB Debugging before continuing with the process.
How to enable USB Debugging mode on Android
The steps involved in enabling USB debugging mode on Android 4.2 or newer are different from the older Android versions. We will cover all the Android versions in this guide.
Enable USB debugging on Android Marshmallow, Lollypop, Kitkat, or Jellybean (4.2 or later)
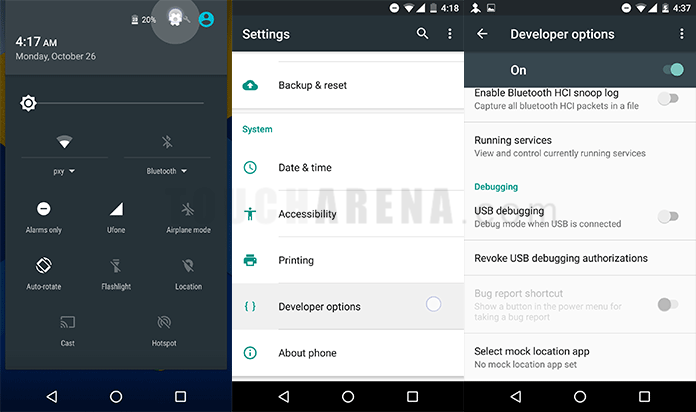
- Go to Settings on your Android device running Android 4.2 or later version.
- Scroll down to the bottom and tap on Developer Options.
Develop options missing? Follow this link: How to enable developer options. - Make sure developer options are turned on.
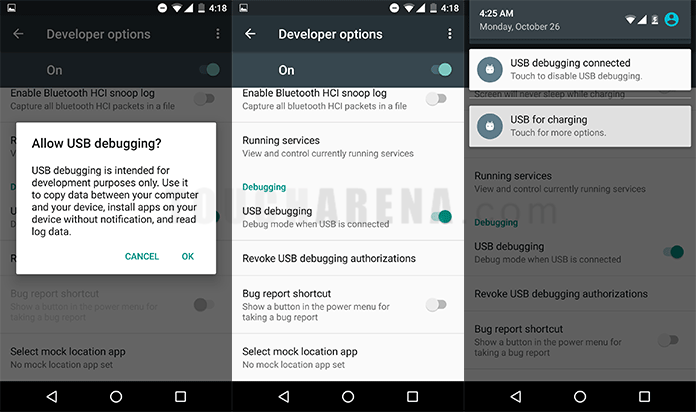
- Scroll down and turn on the USB Debugging toggle under debugging section.
- Confirm the pop-up message by tapping Ok.
- Now whenever that android device is connected to a computer, a notification message saying “USB debugging connected” will appear.
Enable USB debugging on Android 4.1 or 4.0 Ice cream sandwich
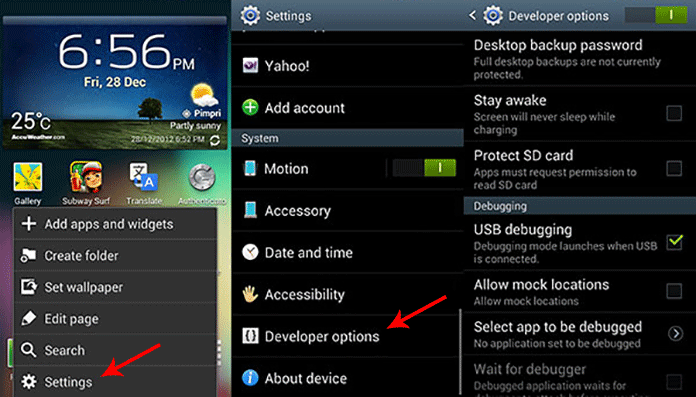
- Go to Settings.
- Tap on Developer options and enable them.
- Scroll down in developer options and check mark the USB Debugging field.
Enable USB debugging mode on Android 2.3 Gingerbread
- Go to Settings.
- Tap on Applications.
- Tap on Development.
- Finally, check mark USB debugging.

Do not forget to share your experience in the comments section below and also friend with us on Facebook, follow us on Twitter, or join us on Google+.
Pingback: Download Android USB drivers for Windows and Mac
Pingback: How to install ADB and Fastboot on Windows, Mac OS X, Linux
Pingback: Install Android Marshmallow 6.0 on Nexus devices - How To
Pingback: How to unlock bootloader of Nexus 6P/5X/5/4, Nexus 7/9/10