If you have decided to tinker with your Google Nexus 5X, install custom ROMs, or want to try some sort of hackery with it, your first step should be to install a custom recovery such as TWRP (TeamWin Recovery Project) on your Nexus 5X. In this guide, we are going to talk about how to install TWRP recovery on Nexus 5X.
Every Android phone is shipped with a stock recovery and the stock recovery varies slightly between various phone makers. But the core functions of Android stock recoveries are identical i.e. to manually flash official firmware updates, factory resets the device and clears the cache. However, these stock recoveries are pretty limited in their capabilities and that’s where a custom recovery fills the gap.
Once you have installed TWRP custom recovery on your Nexus 5X, you’ll then be able to easily flash any custom ROM, official firmware, create and restore a full backup image of your device. In other words, it gives you an ultimate control over your device.
Prerequisites

Install Drivers:
Make sure you have properly installed drivers for your Nexus 5X device. If you do not have drivers for it, check out the link floating on the right.
Backup your Important stuff:
Before doing anything to your Nexus 5X, it’s always a good idea to keep a backup of your personal and other important data that you have on your device.
Setup ADB & Fastboot:
The first thing you need to do is setup ADB & Fastboot on your computer. This can easily be done using ADB Installer which also installs drivers for your device. Alternatively, you can install the official Android SDK to get it done which is a lengthy and time-consuming process. Simply follow the link floating to the right in order to get detailed instructions on ADB & Fastboot installation on Windows, Mac OS X, or Linux.

Unlock Bootloader:
Before proceeding with the TWRP recovery installation process, please note that you have to unlock bootloader of your Nexus 5X. It is a prerequisite before flashing any custom recovery or a custom ROM. Put your device in Fastboot mode, connect it to your computer, open Command prompt on your computer, and execute the following command:
fastboot oem unlock
Follow the on-screen instruction to complete the process. If you’re having trouble in unlocking bootloader, simply follow the related article link floating towards the right.
After setting up the ADB & Fastboot and unlocking the bootloader of your device, simply follow these steps:
How to install TWRP recovery on Nexus 5X
I assume that you fulfill the prerequisites of installing TWRP recovery that have been mentioned above. Now simply follow the instructions below to install TWRP recovery on Nexus 5X:
- Create a new folder on your desktop and name it TWRP. Download the file linked below and put it in the “TWRP” folder on your desktop.
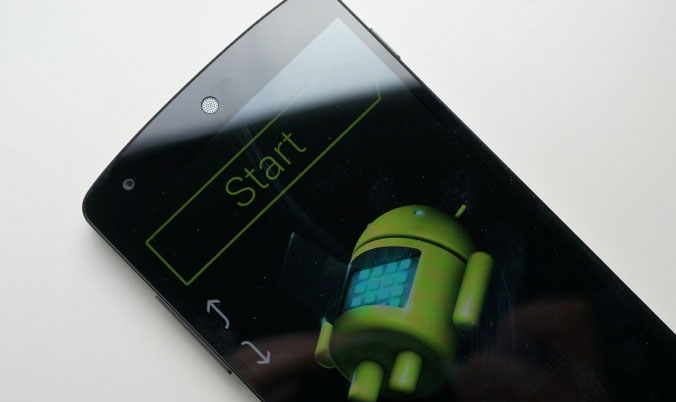
- Turn off your Nexus 5X, press and hold the Power and Volume down buttons simultaneously. In a few seconds, you device will enter bootloader mode. Now connect your Nexus 5X to your computer via USB cable and make sure USB drivers have been properly installed.

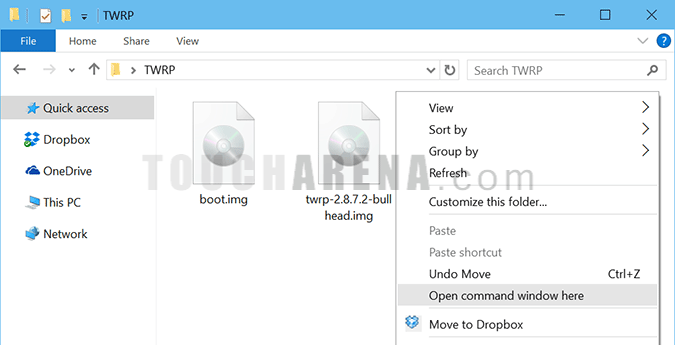
- Go to the TWRP folder on your desktop, hold down the Shift key on your keyboard, right-click anywhere inside the nexus folder, and choose Open command window here.

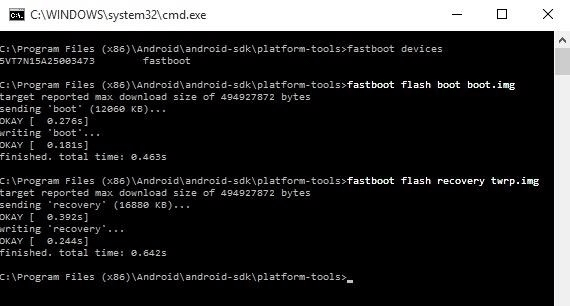
- Type the following commands and hit the Enter key after each command:
fastboot flash boot boot.img
fastboot flash recovery <filename>.imgfor example: fastboot flash recovery twrp-2.8.7.2-bullhead.img

- User the Volume keys to navigate to Reboot Bootloader option and press the Power key to reboot into bootloader.
- Once the Nexus 5X has been rebooted into the bootloader again, use Volume keys to navigate to the Recovery mode option and press power key to boot your device into freshly flashed TWRP recovery.
- At this point, you’ll see a menu asking to make TWRP your permanent recovery, so swipe the slider at the bottom to do so.
That’s it! You have successfully installed TWRP recovery on your Google Nexus 5X. It’s now safe to disconnect your device from your computer. You can get out of Recovery mode by selecting the reboot option from within the recovery.
If you have any query, feel free to ask in the comments section below.
Pingback: How to root Nexus 5X - Touch Arena