Those internet users who are using limited internet bandwidth or paying for the internet on the usage of each additional MB or GB are mostly conscious of their data usage. For their ease, Windows 10 has been introduced with internet data usage monitoring feature that allows you to easily check how much data you have consumed while using Windows 10 computer. The Feature to check data usage also existed in Windows 8, but Microsoft has made it a pretty useful one in Windows 10.
There are two different ways to monitor data usage in Windows 10:
Here are the detailed instructions to check bandwidth consumption in Windows 10.


How to check Data usage in Windows 10 – Task Manager
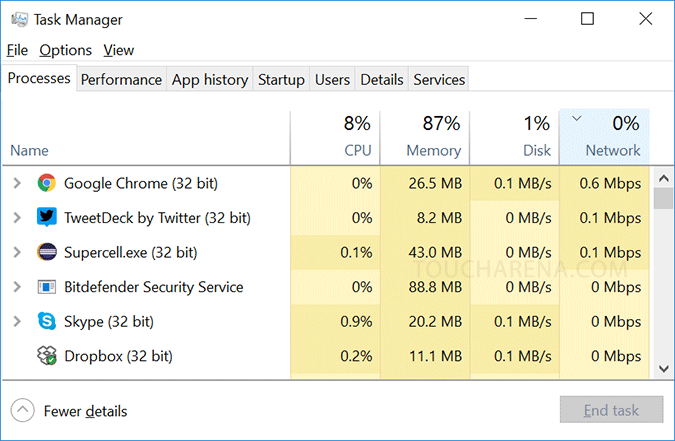
- Right click on the Task bar and click on “Task Manager”. This should open the Task Manager in Windows 10.

- Click on “More details” to expand the task manager window to get more detailed view.
- “Processes” will appear on top. “Processes” tab is displaying a table of processes of all active applications. By default, this table shows five columns, the first column of the table shows a list containing names of all active applications. This list has three categories:
- “Apps”: These are those applications which you are currently running on the front end and you usually open them yourself, for example MS Word, Internet Explorer, and Movies & TV etc.
- “Background Processes”: These are those applications which are working on the background and some of these applications may or may not be using internet data.
- “Windows Processes”: This list displays process of those applications which are part of Windows 10 operating system and working on the back-end. Few of these applications might be using internet data.
The 2nd column of the table shows “CPU” usage in percentage, the 3rd column shows “Memory” or RAM usage, the 4th column shows “Disk” usage and the last 5th column shows “Network” usage of each respective application.

- “Network” column displays current data usage of each active application or process. The data usage displayed under “Network” is from both sources, which are Local Area Network (LAN) and your internet connection.
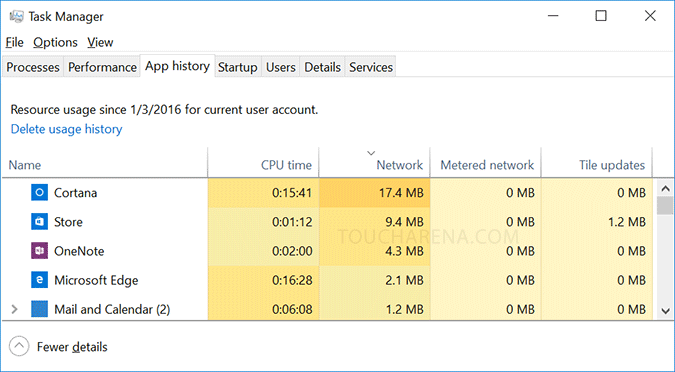
- Now go to “App History” tab which shows the applications of Windows 10 only. Here under “Network” column, you can check the history of data usage by the respective application.

- If you have enabled “Metered Network” feature then your network usage will be automatically be reduced by Windows 10 Apps. You can also check that under “Metered Network” column.

How to Monitor Data usage in Windows 10 – Settings
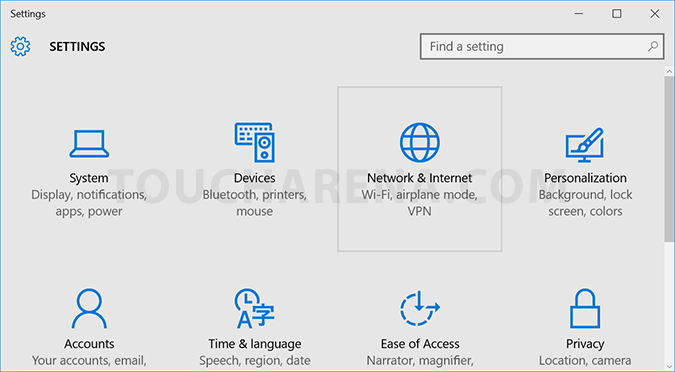
- Click on Windows 10 icon on the left bottom corner of Desktop and then click “Settings”.
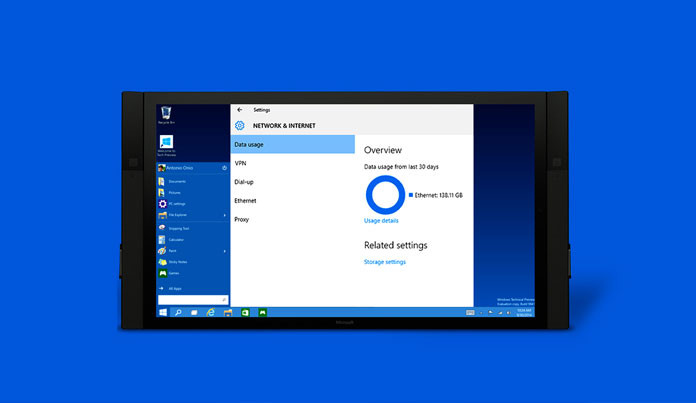
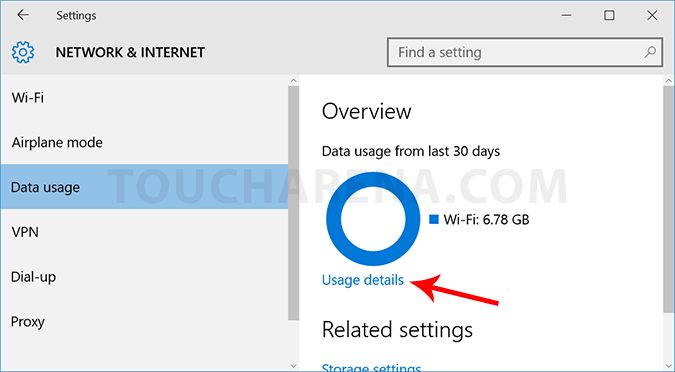
- In settings window click “Network & Internet”.
- Under “Network and Internet” select “Data Usage”. This will show you a donut graph for each internet connection you are using and an overview of data usage of last 30 days.
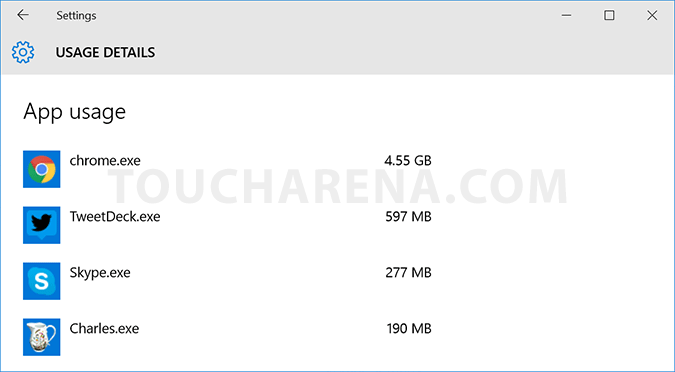
- For further details click “Usage Details” link given under the donut graph. A Usage details window should open providing detail of data usage by each application.
Hope you can now easily monitor your data usage and get an in-depth picture of your internet data usage habit.
nice